Mongodb REPLICATION
Disclaimer
I don’t know anything about what I wrote.😉

What is database replication
It is a technique where an instance of a database is exactly copied to another location.
There are many types of database replication but for now we will look at physical replication. Physical replication alllows you to replicate the entire database cluster onto another server.
Synchronous replication creates copies of data in real time. As synchronous replication is continuously creating data in real time, it tends to be very expensive. However, it is also very reliable in the event of a disaster.
Synchronous replication requires capable computation capacity because it creates latency and slows the primary systems. It does this by using WAL to stay in sync. It replicates everything on the cluster.

Advantages of Replication
- High Availability : when one node or the primary node goes down, another node in the cluster can be switched on and relied upon for serving the workload.
- Increased read performance : Multiple machines provide greater processing power and data can be spread across multiple machines on a network. This vastly improves your application’s read performance.
- Greater scalability : As your user base grows and report complexity increases, your resources can grow.
Lets start
We shall do this by using docker.
- Creating a single database

2. Now lets stop the docker then create another database using docker compose
version: '3.0'services: demo-mongo-worker-3: image: 'mongo:latest' ports: - '27018:27017' restart: always
3. Then we run docker-compose up
4. We run docker-compose down to stop the mongodb container
5. Finally let us create a replica set
We create one primary node and three secondary nodes. If the primary node goes down the other nodes vote to elect a new primary node. Each node requires a data volume and also a shared volume for the nodes to communicate.
For this to work we need volumes and a single network of type bridge.
For our services.
We need a docker container to generate a new key every time the cluster is started. First we create an openssl image which will be responsible for creating our keyfile.
For the primary node we will mount the shared volume and its own volume. We also set its password and username with environment variables then map its port from 27017 to 2717 since I am running mongodb in my local machine.
For the secondary nodes we only change the port mapping, their names and volumes.
6. If we run this it should bring up the cluster.
Our compose file is here:
version: '3.0'services: demo-mongo-keys: image: openssl build: openssl/. volumes: - 'demo-mongo-keys:/mongo-conf' command: bash -c "openssl rand -base64 741 > /mongo-conf/mongodb-keyfile; chmod 600 /mongo-conf/mongodb-keyfile; chown 999 /mongo-conf/mongodb-keyfile" demo-mongo-primary: image: 'mongo:latest' volumes: - 'demo-mongo-keys:/opt/keyfile' - 'demo-mongo-data-0:/data/db' env_file: ./mongod.env ports: - '2717:27017' command: mongod --auth --keyFile /opt/keyfile/mongodb-keyfile --replSet demo-replica-set depends_on: - demo-mongo-keys networks: demo-replica-set: demo-mongo-worker-1: image: 'mongo:latest' volumes: - 'demo-mongo-keys:/opt/keyfile' - 'demo-mongo-data-1:/data/db' env_file: ./mongod.env ports: - '27018:27017' command: mongod --auth --keyFile /opt/keyfile/mongodb-keyfile --replSet demo-replica-set depends_on: - demo-mongo-keys networks: demo-replica-set: demo-mongo-worker-2: image: 'mongo:latest' volumes: - 'demo-mongo-keys:/opt/keyfile' - 'demo-mongo-data-2:/data/db' env_file: ./mongod.env ports: - '27019:27017' command: mongod --auth --keyFile /opt/keyfile/mongodb-keyfile --replSet demo-replica-set depends_on: - demo-mongo-keys networks: demo-replica-set: demo-mongo-worker-3: image: 'mongo:latest' volumes: - 'demo-mongo-keys:/opt/keyfile' - 'demo-mongo-data-3:/data/db' env_file: ./mongod.env ports: - '27020:27017' command: mongod --auth --keyFile /opt/keyfile/mongodb-keyfile --replSet demo-replica-set depends_on: - demo-mongo-keys networks: demo-replica-set: volumes: demo-mongo-keys: demo-mongo-data-0: demo-mongo-data-1: demo-mongo-data-2: demo-mongo-data-3: networks: demo-replica-set: driver: bridge ipam: driver: default config: - subnet: 172.10.99.0/24
7. We will login to the demo-mongo-primary node, define our replica set and then make it the new primary node by setting its priority high.
docker-compose exec demo-mongo-primary mongo -u "root" -p "password"
8. Instatiate the replica set
rs.initiate( {"_id" : "tut12-replica-set", "members" : [ {"_id" : 0,"host" : "tut12-mongo-primary:27017"}, {"_id" : 1,"host" : "tut12-mongo-worker-1:27017"}, {"_id" : 2,"host" : "tut12-mongo-worker-2:27017"}, {"_id" : 3,"host" : "tut12-mongo-worker-3:27017"} ] });
9. Set the priority of the master over the other nodes
conf = rs.config();
conf.members[0].priority = 2;
rs.reconfig(conf);
10. Now lets add some data and check to set it.
11. We head over to json-generator to generate json data to push to our mongodb
[ '{{repeat(10000)}}', { _id: '{{objectId()}}', index: '{{index()}}', guid: '{{guid()}}', isActive: '{{bool()}}', balance: '{{floating(1000, 4000, 2, "$0,0.00")}}', picture: 'http://placehold.it/32x32', age: '{{integer(20, 40)}}', eyeColor: '{{random("blue", "brown", "green")}}', name: '{{firstName()}} {{surname()}}', gender: '{{gender()}}', company: '{{company().toUpperCase()}}', email: '{{email()}}', phone: '+1 {{phone()}}', address: '{{integer(100, 999)}} {{street()}}, {{city()}}, {{state()}}, {{integer(100, 10000)}}', about: '{{lorem(1, "paragraphs")}}', registered: '{{date(new Date(2014, 0, 1), new Date(), "YYYY-MM-ddThh:mm:ss Z")}}', latitude: '{{floating(-90.000001, 90)}}', longitude: '{{floating(-180.000001, 180)}}' }]
12. We will use the python script to push data to the database.
We finally run the bash file to push data.
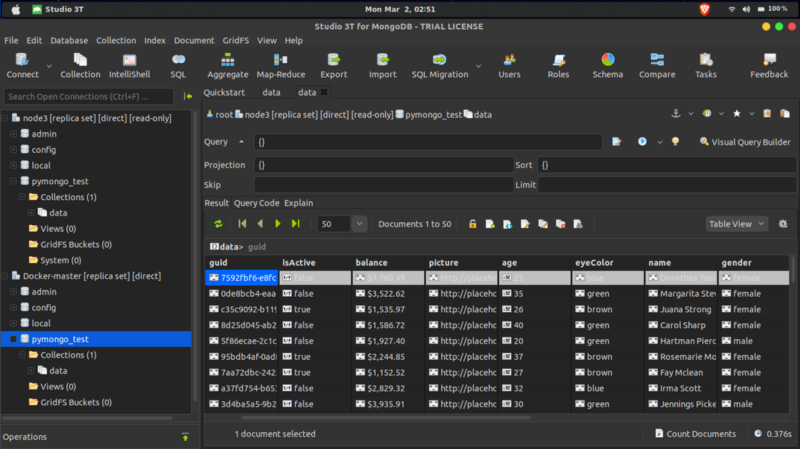
13. Check the data base:
Considerations
This replica set consists of 3 nodes as you can see.However, if you decide to go with an even number say 4 members, deploy an arbiter so that the set has an odd number of voting members. Voting is usually conducted by cluster members to elect a primary node and so adding an arbiter ensures no ties arise during voting.