H3: First Half of the 12-Factor App
“Let’s go invent tomorrow instead of worrying about what happened yesterday.” — Steve Jobs
The previous blog is at: “H2: IoT hardware for a 12-factor application”
Introduction
Many businesses wish to avoid relying solely on third-party technologies, and it may be helpful to examine the ideas that underpin an application design. It will also assist you in evaluating and comparing various solutions for resolving the underlying difficulties. Heroku, as a platform on which hundreds of millions of apps are deployed, has had to isolate the basic design principles for cloud-based applications and provide an environment that makes them simple to create and manage. The 12-Factor App is a manifesto that describes these ideas.
The first part of this post walks through the first six factors and reworks a simple Arduino IoT application with them in mind. Part 2 continues with the remaining six factors, demonstrating how this design allows easier integration with containerization technologies like Docker. I won’t cover advanced container orchestration, but I would recommend you give it a shot
1. Codebase
Yup, 💯 GitHub.
Our codebase is located on GitHub. If you are a software developer, chances are that you have interacted with GitHub. I personally love Github but also have an appreciation for Gitlab. Initially, I was using Gitlab for CI-CD because they had a robust pipeline but 🤔 with the introduction of Github actions, I had to switch up. Github makes it easy to contribute to open source. Many, if not all the software developers have an account at GitHub. This makes the user base increase, thus you can interact with many people’s projects. Nearly every open-source tool you’ll find while scouting the internet 🌐 is hosted on Github. If your project is open-source, GitHub is free to use. It also contains a wiki and issue tracker that makes things simple and provides more extensive documentation and feedback. To contribute, just fork a project, make your changes, and submit a pull request via the GitHub web app or their ⭕ new cli. With excellent wiki files, 📁📁 you can build the documentation of your project inside the wiki files. Their blog has guides on nearly every issue related to git. If you can’t 🙅 find it, make StackOverflow your companion in your journey of attaining greatness. ⁉️✊🏆 You can also write a well-formatted markdown. Github actions allow you to track changes in your code across versions. Much like using Microsoft Word or Google Drive, you can have a version history of your code so that previous versions are not lost with every 🆗 iteration. If you are working on an exciting project and you need help with software development, let us know! We would be happy to know more about it! A codebase could be a source code store or a set of storehouses that share a common root. The single codebase for an application is utilized to create any number of permanent discharges that are ordained for distinctive environments. According to Conway’s law, 😱 a team’s organisation will eventually be reflected in the architecture of the product the team creates. In other words, 📓 team dysfunction, poor 😥 organisation, and a lack of discipline generally lead to code dysfunction or a lack of discipline.
2. Dependencies
Yup uses requirements.txt
All dependencies must be disclosed and separated clearly. A 12-factor service never relies on system-wide packages and utilises a dependency separation technique to prevent system-wide packages from “leaking in” during execution. Arduino requirement is a good example. We may utilise a virtual environment to expressly separate the local app’s environment from the global “site-packages” installs, which we can generate and use (source).
#include <DNSServer.h> //https://github.com/espressif/arduino-esp32/tree/master/libraries/DNSServer
#include <WebServer.h> //https://www.arduino.cc/en/Tutorial/LibraryExamples/WebServer
#include <WiFi.h> //https://github.com/espressif/arduino-esp32/tree/master/libraries/WiFi
#include <HTTPClient.h> //https://github.com/espressif/arduino-esp32/tree/master/libraries/HTTPClient
#include <Update.h> //https://github.com/espressif/arduino-esp32/tree/master/libraries/Update
#include <WiFiManager.h> //https://github.com/tzapu/WiFiManager
#include <Adafruit_Sensor.h> //https://github.com/adafruit/Adafruit_Sensor
#include <DHT.h> //https://github.com/adafruit/DHT-sensor-library
#include <PubSubClient.h> //https://github.com/knolleary/pubsubclient
#include <ArduinoJson.h> //https://github.com/bblanchon/ArduinoJson
These are the hardware libraries we used in coming up with the hardware client.
3. Config
Yup, uses .env files
Now since our board is Wi-Fi enabled, we need to store our Wi-Fi passwords and MQTT credentials before we are ready to publish them on GitHub.
If your code likes this:
#define WIFI_SSID “eduroam”
#define WIFI_PASSWORD “eduroam_password_#262&*(”
#define MQTT_SERVER “mqtt.jkuat.ac.ke”
#define MQTT_USER “studens_email”
#define MQTT_PASS “reg_number”
do not share it! You’d reveal your ESSID, password, and MQTT credentials to other people who can take advantage of your application.
Keep secrets in a separate file. Make a new file called Arduino `config.h` with the following contents:
#define WIFI_SSID “eduroam”
#define WIFI_PASSWORD “eduroam_password_#262&*(”
#define MQTT_SERVER “mqtt.jkuat.ac.ke”
#define MQTT_USER “studens_email”
#define MQTT_PASS “reg_number”
We then exclude the secrets file from git using the `.gitignore` file. We add `config.h` to `.gitignore` (create it in the root of the project if it doesn’t exist already).
Add an example for the secrets file. If you simply hide the original `config.h`, other users who would like to reuse your code may not know what to put inside. Create an example file named `example_config.h`. This will contain dummy values:
#include <config.h>
char wifiSsid[] = WIFI_SSID
char wifiPass[] = WIFI_PASSWORD
char mqttServer[] = MQTT_SERVER
char mqttUsername[] = MQTT_USER
char mqttPassword[] = MQTT_PASS
What if I need to develop my code in continuous integration and continuous deployment environment?
If you wish to create your code in a Continuous environment, the entire source code must be present, but you don’t want to publish your secrets to GitHub. So, what should you do?
Keep your secrets hidden in environment variables.
For each secret, create an environment variable in your CI (or set it directly on your workstation if you want to build it locally):
Alternative techniques for securely storing secrets may exist. If you have a better one, please leave a comment.
4. Backing services
BYOBacking service
Any service the app uses via the network as part of its usual functioning is referred to as a backing service. Databases, messaging/queuing systems, SMTP services for outgoing email, and caching systems are all examples.
The database and other backend services are often handled by the same systems administrators who install the app’s runtime. The app may additionally include services offered and managed by third parties in addition to locally controlled services. SMTP services (like Postmark), metrics-gathering services (like New Relic or Loggly), and binary asset services (like Amazon) are all examples.
1. RabbitMQ
rabbitmq:
build: rabbitmq/
image: mqtt-rabbitmq
container_name: “mqtt”
Sending IoT data to your backend server for processing and use by other services is a frequent chore for developers. Using Message Queue might be one of the solutions. RabbitMQ is a hybrid message queueing broker. It is hybrid in the sense that it supports many protocols such as AMQP, MQTT, and WebSockets. AMQP (Advanced Message Queueing Protocol) is a message-oriented middleware application layer protocol that is accessible to everybody. Message orientation, queuing, routing, dependability, and security are all characteristics of AMQP. MQTT (Message Queue Telemetry Transport) is a protocol for connecting to faraway sites with a minimal code footprint or low network capacity. AMQP is designed with more advanced features and has more overhead than MQTT. But in real-world application development, we may need AMQP like reliable message queue and also has lightweight devices to work with. RabbitMQ has the flexibility to use both protocol AMQP & MQTT together.
2. InfluxDB
influxdb:
image: influxdb:1.7-alpine
container_name: “influxdb”
Influxdb is a time-series database. Every IoT device creates time-series data, and the demand for additional analytics is fueling the growth of these devices and the data they generate. InfluxDB has shown its worth to some of the world’s most demanding IoT customers. The amount of data generated by IoT devices, as well as the desire to consume it, is continuously increasing. InfluxDB grows to collect and index huge amounts of IoT data while also offering real-time analytics and quick query response times.
3. Telegraf
telegraf:
image: telegraf:1.11-alpine
container_name: “telegraf”
depends_on:
- rabbitmq
- influxdb
Telegraf is a server agent that collects and sends metrics and events from databases, systems, and IoT devices via a plugin-driven interface. It can connect to data sources such as MongoDB, MySQL, gather data from your contemporary cloud platform, container and Gather important stateful data from IoT sensors and equipment (pressure levels, temperature levels, etc.).
Telegraf depends on rabbitmq where it fetches data from MQTT topics and influxdb where it stores the data to the time-series database.

4. Kapacitor
kapacitor:
image: kapacitor:1.5-alpine
container_name: “kapacitor”
links:
- influxdb
Kapacitor is a real-time streaming data processing engine. It is action-oriented, you can be able to plug in your machine learning models to do anomaly detections and many more.
Kapacitor depends on influxdb from where the data is stored.
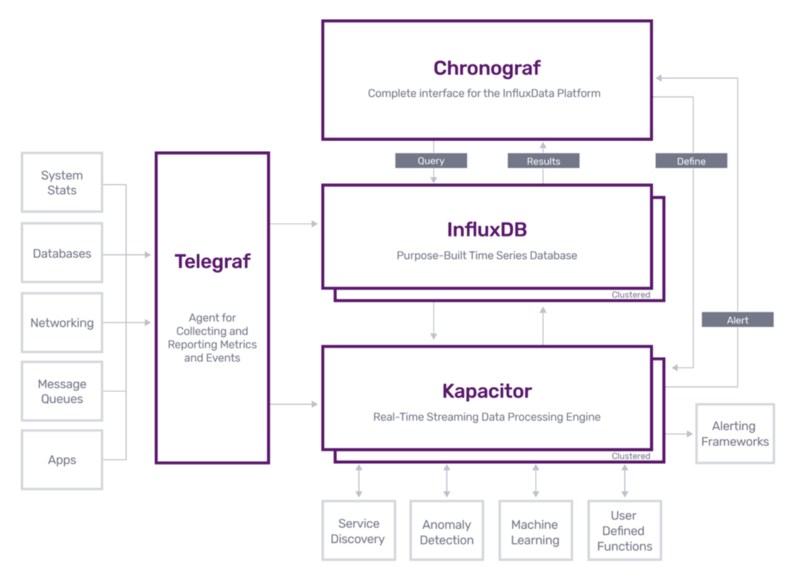
5. Chronograf
chronograf:
image: chronograf:1.7-alpine
container_name: “chronograf”
links:
# Chronograf requires network access to InfluxDB and Kapacitor
- influxdb
- kapacitor
depends_on:
- kapacitor
- influxdb
- telegraf
Chronograf lets you rapidly examine the data you’ve saved in InfluxDB, allowing you to create more sophisticated searches and alerts. It’s easy to use and comes with templates and libraries to help you quickly create dashboards with real-time data visualisations.
Chronograf depends on influxdb from where the data is stored, telegraf which collects metrics and kapacitor from where stream processing happens.
It has to link with influxdb and kapacitor
6. Grafana
grafana:
image: grafana/grafana:latest
container_name: “grafana”
depends_on:
- influxdb
links:
- influxdb
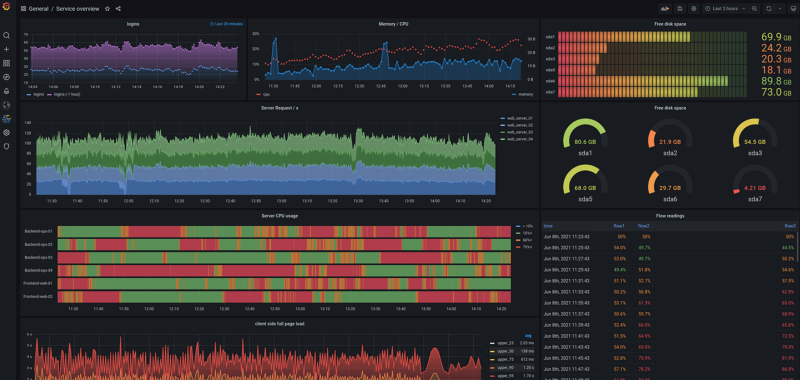
Grafana is a visualisation and analytics programme that is free and open source. It allows you to query, visualise, alert on, and study your data from any location. It gives you the tools to transform your time-series database (TSDB) data into stunning graphs and visualisations, in simple English.
Grafana depends on influxdb.
It has to link with influxdb too.
7. Portainer
portainer:
image: portainer/portainer-ce:latest
container_name: portainer
Portainer’s super-simple’opinionated’ GUI makes it simple for anybody to get up and running quickly. Platform Managers can use it to the central setup, administer, and secure multi-cluster settings, while Developers can deploy, manage, and debug containerized programmes without knowing anything about Kubernetes.

5. Build, release, run
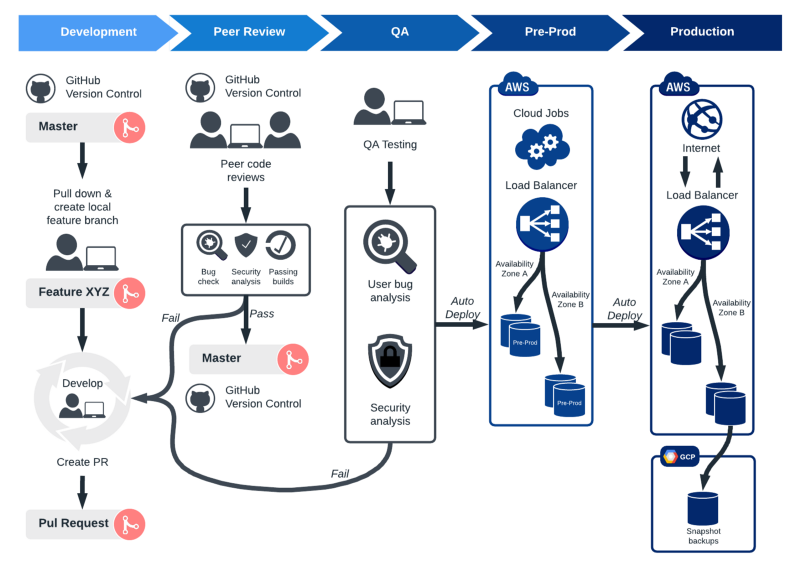
Bugs. 🐞 Downtime. Users are enraged. Does this sound 👂 familiar? If this is the case, you 😊 may need to reconsider your release management approach. You can’t afford to deliver half-baked releases in the fast-paced, ever-changing world of corporate IT. Nonetheless, changes in software or its surroundings cause an astounding 75% of problems. You must invest 🔝 in a strong release management strategy to avoid costly delays and keep your organization’s operations operating. From creation and testing to deployment, release management controls all stages of a software release. 😌 When a new product or updates to an existing product are sought, release management is necessary. While release management methods vary and should be tailored to each business, 👩💼 there are five key stages to consider.
1. 1️⃣ Make a release plan: Planning takes the most time 🕐 because it involves structuring the complete release from beginning to end. A solid release strategy helps keep your team 👥 on schedule and guarantee that all standards and criteria are satisfied.
2. Release of the build: After you’ve finalised the release 😌 strategy, you may begin designing and constructing the product for release. This is the product’s real “development” based on the criteria specified in the release plan. After you’ve fixed ✅ any issues that have arisen, it’s time to put the build through real-world scenario testing. This may need numerous iterations. As the team 👥 completes the product, it is delivered to a testing environment for user acceptance (typically automatically). This enables the team to discover any faults or difficulties that may emerge in a real-world scenario. As flaws are discovered, the build is returned to stage two for further development.
3. 📊 Testing for user approval: 👏 User acceptance testing, often known as UAT, occurs when the product’s intended users are allowed to use it and provide comments. This is frequently done as a free beta trial online or with a broader number of corporate workers.
4. 🕓 Create a press release: This stage involves putting the finishing touches on the product while keeping every feedback gathered during UAT in mind. A final quality check by the QA team is also part of the release preparation process.
5. 🔳 Roll out the release The big 😃 day has finally arrived, and this is where all of your team’s hard work will 🔥 be rewarded. It’s time to let your product loose in the wilds of live 🐙 production.
6. Processes
Thanks, Docker!
A 12-factor application operates as one or more stateless processes that share nothing and maybe partitioned horizontally. All data that has to be saved must be backed up to a stateful service, which is generally a database. This means no in-memory or local disk-based caches, as well as no sticky sessions. Instead of demonizing or writing their own PID files, these processes should rely on the execution environment’s process management (such as Upstart).
This aspect must be taken into account right from the start, in conjunction with the talks on antifragility, horizontal scaling, and overall application architecture. We’ve already achieved this goal because the sample app delegated all stateful persistence to a database.
It’s worth noting, though, that utilising the normal Ubuntu base image for Docker has resulted in several problems, one of which being process management (or lack thereof). Check out base image-docker if you want to utilise a process manager to automatically restart crashed daemons or alert a service registry or operations team. This image provides a unit for process management and supervision, as well as additional enhancements to basic Ubuntu for Docker use, such as the removal of the requirement for PID files.

Important
The whole code can be found here
“We are in a brave new world where not only do our children talk back to us, but so do our appliances.” — Mohammed Dastagir
If you liked this article, click the👏 multiple times below so other people will see it here on Medium.
Let’s be friends on Twitter. Happy Coding 😉
Acknowledgement
1. Kelvin Gitu
References
1. https://www.pluralsight.com/guides/download-large-files-from-remote-servers-using-nginx-docker
2. https://tr-ex.me/translation/english-japanese/outbound+email
3. https://bingohuang.gitbooks.io/12factor/content/en/backing-services.html
4. https://medium.com/@Apiumhub/interesting-facts-about-software-development-statistics-apiumhub-536d0e4a117c
5. https://medium.com/@Apiumhub/benefits-of-using-github-3a960f7a7b73